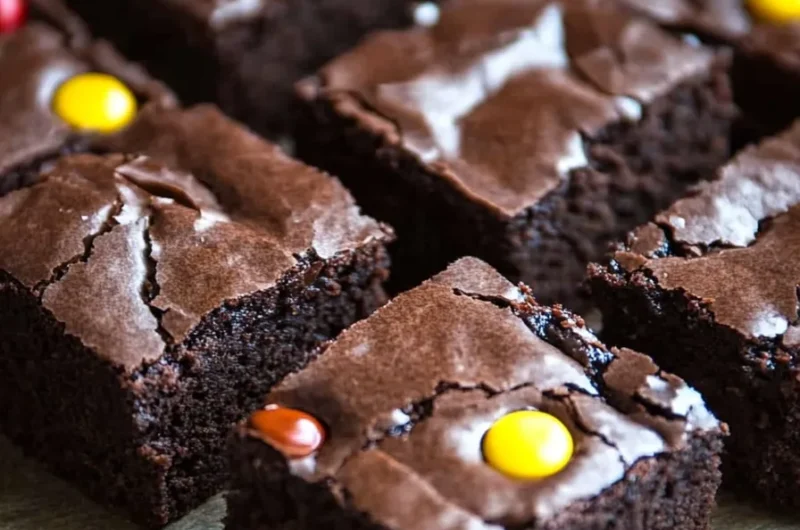
Gluten Free Little Debbie Brownies are a delightful twist on a beloved classic, perfect for those who are gluten-sensitive or simply prefer gluten-free treats. This recipe is not just amazing; it’s a fantastic way to indulge without compromising taste. These brownies capture the rich, chocolatey essence of their famous counterparts, ensuring you won’t miss out on flavor or texture.
Imagine sinking your teeth into a fudgy, gooey brownie that melts in your mouth. Each bite offers a sweet reminder of childhood snacks, transporting you back to simpler times. Whether you’re enjoying them as an afternoon pick-me-up or serving them at a gathering, Gluten Free Little Debbie Brownies are bound to impress everyone, gluten-free or not.
With this helpful guide, you’ll discover why these brownies are a must-try, the simple ingredients needed for deliciousness, and step-by-step instructions to streamline the process. Let’s get started on this journey to redefine a classic dessert!
Why You’ll Love This Recipe
Gluten Free Little Debbie Brownies are not just an alternative; they offer an indulgent experience that everyone can enjoy. Here are compelling reasons to love this incredible recipe:
1. Rich Chocolate Flavor: These brownies are packed with cocoa, making them satisfyingly decadent.
2. Fudgy Texture: The gluten-free formulation ensures a melt-in-your-mouth quality that rivals traditional brownies.
3. Simple Ingredients: Made with accessible ingredients, this recipe is straightforward and easy to follow.
4. Quick to Prepare: With minimal prep time, you can indulge your cravings in no time at all.
5. Versatile Serving Options: These brownies can be enjoyed plain, topped with frosting, or accompanied by ice cream.
6. Delightfully Kid-Friendly: Kids will love these brownies as a school snack or dessert, and they won’t even notice they are gluten-free!
With these enticing qualities, Gluten Free Little Debbie Brownies are sure to be a hit in any setting!
Preparation and Cooking Time
Creating Gluten Free Little Debbie Brownies is quick and efficient. Here’s a breakdown of the timing involved:
– Preparation Time: 15 minutes
– Cooking Time: 25 minutes
– Cooling Time: 30 minutes
In total, you’ll spend about 1 hour and 10 minutes from prep to plate, making it an ideal recipe for any occasion.
Ingredients
– 1 cup gluten-free flour blend
– 1 cup granulated sugar
– ½ cup unsweetened cocoa powder
– ½ cup vegetable oil
– 3 large eggs
– 1 teaspoon vanilla extract
– ½ teaspoon baking powder
– ¼ teaspoon salt
– ½ cup chocolate chips (optional)
Step-by-Step Instructions
Follow these straightforward steps to create your Gluten Free Little Debbie Brownies:
1. Preheat Your Oven: Set the oven to 350°F (175°C). Prepare an 8×8-inch baking pan by greasing it or lining it with parchment paper.
2. Mix Dry Ingredients: In a medium bowl, combine the gluten-free flour blend, sugar, cocoa powder, baking powder, and salt.
3. Combine Wet Ingredients: In a separate bowl, whisk together the vegetable oil, eggs, and vanilla extract until well combined.
4. Combine Mixtures: Gradually add the wet ingredients to the dry ingredients, stirring until everything is well mixed and smooth.
5. Add Chocolate Chips: If desired, fold in the chocolate chips for an extra layer of chocolate goodness.
6. Pour Batter: Transfer the batter into the prepared baking pan, smoothing the top with a spatula.
7. Bake: Place the pan in the preheated oven and bake for 20-25 minutes or until a toothpick inserted into the center comes out with a few moist crumbs.
8. Cool: Remove from the oven and allow the brownies to cool in the pan for at least 30 minutes before slicing them into squares.
These simple steps will guide you to a batch of irresistible brownies that you’ll crave time and again.
How to Serve
To create the ultimate serving experience for your Gluten Free Little Debbie Brownies, consider these ideas:
1. Presentation: Arrange the brownies on a decorative platter, stacking them for an eye-catching display.
2. Toppings: Top with powdered sugar for a simple yet elegant finish, or drizzle melted chocolate or caramel sauce for added flair.
3. Pairings: Serve warm with a scoop of vanilla ice cream or whipped cream for a decadent touch.
4. Beverage Suggestions: Complement these brownies with a glass of cold milk, a cup of coffee, or a dessert wine for a delightful pairing.
By following these serving suggestions, you’ll make your Gluten Free Little Debbie Brownies not just a treat, but an extraordinary dessert experience that everyone will remember!
Additional Tips
– Use Quality Ingredients: For the best flavor, choose a high-quality gluten-free flour blend and pure cocoa powder. These elevate the taste of your brownies remarkably.
– Don’t Overmix: Once you combine the wet and dry ingredients, mix until just combined. Overmixing can lead to dense brownies.
– Let Them Cool: Allow the brownies to cool completely before slicing for cleaner cuts and better texture.
– Serve Warm: These brownies are particularly delicious when served warm with a scoop of ice cream or a drizzle of chocolate sauce.
– Add Texture: Consider adding chopped nuts or even a swirl of peanut butter for an extra layer of flavor and texture.
Recipe Variation
Feel free to get creative with your Gluten Free Little Debbie Brownies. Here are some tasty variations to try:
1. Mint Chocolate Brownies: Incorporate a few drops of mint extract into the wet ingredients for a refreshing twist. Top with crushed peppermint candy for added flair.
2. Blonde Brownies: Replace cocoa powder with the same amount of brown sugar for blond brownies. These provide a caramel-like flavor.
3. Nutty Brownies: Add chopped walnuts or pecans to the batter for a delightful crunch. The nuts also enhance the flavor profile of the brownies.
4. Cheesecake Swirl: Prepare a simple cheesecake mixture by combining cream cheese, sugar, and an egg. Swirl this into the brownie batter before baking for a rich, creamy addition.
Freezing and Storage
Proper storage can help maintain the freshness of your gluten-free brownies. Here are the best practices:
– Storage: Store the cooled brownies in an airtight container at room temperature for up to 4 days. If you live in a warm climate, refrigeration is recommended.
– Freezing: For longer storage, wrap brownies individually in plastic wrap and place them in a resealable freezer bag. They can be frozen for up to 3 months. To enjoy, simply thaw them at room temperature or warm them in the microwave for a few seconds.
Special Equipment
To ensure success with your Gluten Free Little Debbie Brownies, you’ll need some essential baking tools:
– Mixing Bowls: For combining dry and wet ingredients.
– Whisk: To mix together the wet ingredients uniformly.
– Spatula: To scrape down the sides of the bowl and transfer the batter to the pan.
– 8×8 inch Baking Pan: This is ideal for achieving the perfect brownie thickness.
– Parchment Paper: Optional, but helpful for easy removal of the brownies from the pan.
Frequently Asked Questions
How do I know when the brownies are done baking?
Insert a toothpick into the center; if it comes out with a few moist crumbs, they are ready. Avoid overbaking, as they should remain fudgy.
Can I double the recipe?
Absolutely! If you want a larger batch, simply double the ingredients and use a larger baking pan.
Can I use another sweetener in place of sugar?
Yes, you can substitute granulated sugar with coconut sugar or a sugar alternative like Stevia. Just be sure to adjust the quantity accordingly based on your sweetener’s sweetness level.
Are these brownies suitable for vegans?
You can substitute the eggs with a flaxseed egg or applesauce to make a vegan version. Adjust the liquids in your recipe accordingly.
Can I make these brownies ahead of time?
These brownies are perfect for making in advance. Bake them, cool, and store them in an airtight container. Enjoy them within a week for the best flavor.
Conclusion
Gluten Free Little Debbie Brownies provide a delicious, indulgent experience that everyone can enjoy. With their rich chocolate flavor and fudgy texture, they stand tall among traditional brownies. This recipe offers simplicity and versatility, making it an excellent choice for any occasion. Whether you serve them at a family gathering or enjoy them as a sweet afternoon treat, these brownies are sure to delight. Get ready to indulge in a nostalgic experience that tastes as good as it looks!
Gluten Free Little Debbie Brownies: An Incredible Ultimate Recipe
- Prep Time: 15 minutes
- Cook Time: 25 minutes
- Total Time: 40 minutes
Ingredients
– 1 cup gluten-free flour blend
– 1 cup granulated sugar
– ½ cup unsweetened cocoa powder
– ½ cup vegetable oil
– 3 large eggs
– 1 teaspoon vanilla extract
– ½ teaspoon baking powder
– ¼ teaspoon salt
– ½ cup chocolate chips (optional)
Instructions
Follow these straightforward steps to create your Gluten Free Little Debbie Brownies:
1. Preheat Your Oven: Set the oven to 350°F (175°C). Prepare an 8×8-inch baking pan by greasing it or lining it with parchment paper.
2. Mix Dry Ingredients: In a medium bowl, combine the gluten-free flour blend, sugar, cocoa powder, baking powder, and salt.
3. Combine Wet Ingredients: In a separate bowl, whisk together the vegetable oil, eggs, and vanilla extract until well combined.
4. Combine Mixtures: Gradually add the wet ingredients to the dry ingredients, stirring until everything is well mixed and smooth.
5. Add Chocolate Chips: If desired, fold in the chocolate chips for an extra layer of chocolate goodness.
6. Pour Batter: Transfer the batter into the prepared baking pan, smoothing the top with a spatula.
7. Bake: Place the pan in the preheated oven and bake for 20-25 minutes or until a toothpick inserted into the center comes out with a few moist crumbs.
8. Cool: Remove from the oven and allow the brownies to cool in the pan for at least 30 minutes before slicing them into squares.
These simple steps will guide you to a batch of irresistible brownies that you’ll crave time and again.
Nutrition
- Serving Size: 16 squares
- Calories: 190 kcal
- Fat: 9g
- Protein: 3g