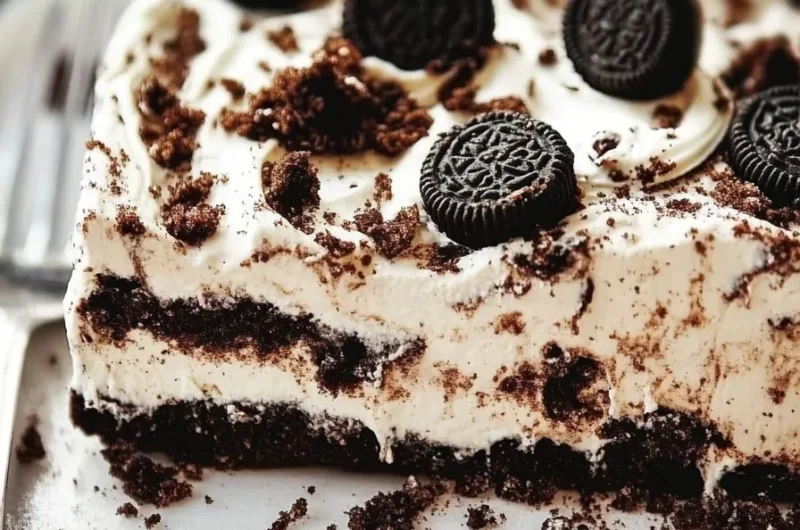
Heavenly Oreo Dessert is a delightful indulgence that will elevate any occasion. This amazing dessert features layers of creamy goodness, rich chocolate, and, of course, everyone’s favorite cookie—Oreos. The combination of textures and flavors creates an experience that leaves a lasting impression on taste buds. Whether you’re celebrating a special event or simply want a sweet treat, this dessert will surely satisfy your cravings.
Imagine biting into a slice of this Heavenly Oreo Dessert. The first thing you notice is the smooth and creamy filling harmoniously blended with the crunch of Oreo crumbs. This luscious dessert is perfect for sharing with family and friends, adding joy to gatherings. It’s not only delicious but also visually appealing, making it a standout centerpiece and conversation starter.
This guide will take you through the process of creating this outstanding dessert. You’ll find a comprehensive recipe and insights into why this dish is a favorite. Its seven layers all work together, providing that toothsome flavor everyone loves. So, roll up your sleeves, and let’s explore why Heavenly Oreo Dessert deserves a place in your recipe collection.
Why You’ll Love This Recipe
Heavenly Oreo Dessert is a crowd-pleaser for many reasons. Here are just a few:
1. Layered Delight: Each layer adds a unique texture and flavor. The combination makes every bite a new experience.
2. Quick to Prepare: With simple instructions and common ingredients, making this dessert becomes a breeze.
3. Versatile: Enjoy it at parties, potlucks, or family gatherings. It suits any occasion wonderfully.
4. Perfect for All Ages: From kids to adults, everyone will appreciate the nostalgic taste of Oreos.
5. No Baking Required: This dessert is a fantastic option for those who prefer not to bake.
6. Makes a Big Batch: Ideal for feeding a crowd, this recipe will leave everyone delightfully satisfied.
7. Easy to Customize: Modify flavors using different cookie varieties or add fun toppings to personalize it.
With these factors in mind, it’s easy to see why Heavenly Oreo Dessert has become a staple in many homes. Not only will it make your taste buds dance, but it also brings people together in celebration.
Preparation and Cooking Time
Creating Heavenly Oreo Dessert is quick and efficient. Below is an overview of the time you’ll spend preparing this fabulous treat:
– Preparation Time: 30 minutes
– Chilling Time: 4 hours (or overnight for best results)
– Total Time: Approximately 4 hours and 30 minutes
While it may seem like a lengthy process due to the chilling time, the hands-on experience is minimal. You can easily make it ahead of time, allowing the flavors to meld beautifully.
Ingredients
– 36 Oreo cookies, crushed into fine crumbs
– ½ cup unsalted butter, melted
– 8 oz cream cheese, softened
– 1 cup powdered sugar
– 2 cups whipped topping (like Cool Whip)
– 1 box (3.4 oz) instant vanilla pudding mix
– 2 cups cold milk
– 1 cup chocolate chips (optional, for topping)
Step-by-Step Instructions
To make Heavenly Oreo Dessert, follow these simple steps:
1. Prepare the Crust: In a medium bowl, mix the crushed Oreo cookies with melted butter until well combined.
2. Press into Pan: Firmly press the mixture into the bottom of a 9×13-inch baking dish to form the crust.
3. Make Cream Cheese Layer: In a mixing bowl, beat the softened cream cheese and powdered sugar together until smooth.
4. Add Whipped Topping: Gently fold in 1 cup of whipped topping into the cream cheese mixture until combined.
5. Spread Cream Cheese Layer: Spoon the cream cheese layer over the crust in the baking dish, spreading it evenly.
6. Prepare Pudding Layer: In another bowl, whisk together the instant vanilla pudding mix and cold milk for about 2 minutes until thickened.
7. Layer Pudding: Pour the pudding on top of the cream cheese layer and spread it evenly.
8. Add More Whipped Topping: Top the pudding layer with the remaining whipped topping.
9. Chill: Cover the dessert and refrigerate for at least 4 hours, or overnight for best results.
10. Garnish: Before serving, sprinkle additional crushed Oreos or chocolate chips over the top for decoration.
These steps will lead you to an incredibly satisfying dessert that captures the spirit of indulgence.
How to Serve
Once you’ve mastered Heavenly Oreo Dessert, serving it right is essential for making a great impression. Here’s how to elevate your serving style:
1. Presentation: Consider using a glass dish to show off the beautiful layers. A clean, sharp knife will help you get perfect squares.
2. Pairing Options: Serve it alongside fresh berries, a drizzle of chocolate sauce, or even a scoop of vanilla ice cream for added richness.
3. Size of Portions: Given the richness of the dessert, consider serving smaller portions to allow guests to enjoy multiple flavors in a meal.
4. Optional Drinks: Pairing the dessert with milk, coffee, or hot chocolate can enhance the experience.
Be sure to take your time with presentation, as a beautifully served Heavenly Oreo Dessert will be remembered just as much as its enchanting flavors!
Additional Tips
– Use High-Quality Ingredients: Opt for fresh Oreos and rich cream cheese for a vibrant flavor.
– Chill Longer: For the best texture, consider chilling the dessert overnight.
– Layer Evenly: Invest time in making sure each layer is even for a more visually appealing presentation.
Recipe Variation
Feel free to get creative with this Heavenly Oreo Dessert! Here are some scrumptious variations to explore:
1. Mint Chocolate Oreo Dessert: Mix in mint extract to the cream cheese layer for a refreshing twist.
2. Peanut Butter Delight: Substitute half of the cream cheese with peanut butter for a nutty flavor.
3. Fruit-Filled Version: Add layers of sliced bananas or strawberries between the cream cheese and pudding layers.
4. Caramel Drizzle: Drizzle caramel sauce over the top layer before chilling for an extra layer of sweetness.
Freezing and Storage
– Storage: Keep the dessert covered in the refrigerator; it will remain fresh for 4–5 days.
– Freezing: This dessert can be frozen for up to 3 months. Make sure to wrap it tightly to avoid freezer burn.
Special Equipment
To successfully prepare Heavenly Oreo Dessert, you’ll need a few essential tools:
– Mixing bowls
– Electric mixer
– Measuring cups and spoons
– 9×13-inch baking dish
– Spatula for spreading layers
– Plastic wrap or foil for covering
Frequently Asked Questions
Can I make this dessert ahead of time?
Yes, it’s great to prepare it a day or two in advance. It actually tastes better when the flavors have time to meld!
How do I know if the pudding layer is set?
The pudding should become thick and hold its shape when you spread it over the cream cheese layer.
Can I use light cream cheese?
Yes, light cream cheese can be used, though it might slightly alter the consistency.
What if I can’t find instant vanilla pudding mix?
You may substitute with vanilla custard for a similar flavor profile, adjusting the liquid as needed.
Is this dessert gluten-free?
To make it gluten-free, opt for gluten-free Oreos and ensure all other ingredients are certified gluten-free.
Conclusion
Heavenly Oreo Dessert is a truly delightful sweet treat that stands out during any gathering. With its unique seven-layered structure, rich flavors, and easy preparation, it is bound to be an instant hit. Whether you’re making it for a special celebration or just to satisfy a sweet tooth, you can’t go wrong with this indulgence. The variations available make it versatile, ensuring you can tailor it to any occasion. Give this recipe a try, and experience why it deserves a prime spot in your dessert repertoire.
Heavenly Oreo Dessert: An Incredible Ultimate Recipe with 7 Layers

- Prep Time: 30 minutes
- Cook Time: 0 minutes
- Total Time: 30 minutes
Ingredients
– 36 Oreo cookies, crushed into fine crumbs
– ½ cup unsalted butter, melted
– 8 oz cream cheese, softened
– 1 cup powdered sugar
– 2 cups whipped topping (like Cool Whip)
– 1 box (3.4 oz) instant vanilla pudding mix
– 2 cups cold milk
– 1 cup chocolate chips (optional, for topping)
Instructions
To make Heavenly Oreo Dessert, follow these simple steps:
1. Prepare the Crust: In a medium bowl, mix the crushed Oreo cookies with melted butter until well combined.
2. Press into Pan: Firmly press the mixture into the bottom of a 9×13-inch baking dish to form the crust.
3. Make Cream Cheese Layer: In a mixing bowl, beat the softened cream cheese and powdered sugar together until smooth.
4. Add Whipped Topping: Gently fold in 1 cup of whipped topping into the cream cheese mixture until combined.
5. Spread Cream Cheese Layer: Spoon the cream cheese layer over the crust in the baking dish, spreading it evenly.
6. Prepare Pudding Layer: In another bowl, whisk together the instant vanilla pudding mix and cold milk for about 2 minutes until thickened.
7. Layer Pudding: Pour the pudding on top of the cream cheese layer and spread it evenly.
8. Add More Whipped Topping: Top the pudding layer with the remaining whipped topping.
9. Chill: Cover the dessert and refrigerate for at least 4 hours, or overnight for best results.
10. Garnish: Before serving, sprinkle additional crushed Oreos or chocolate chips over the top for decoration.
These steps will lead you to an incredibly satisfying dessert that captures the spirit of indulgence.
Nutrition
- Serving Size: 12 servings
- Calories: 320 kcal
- Fat: 18g
- Protein: 4g