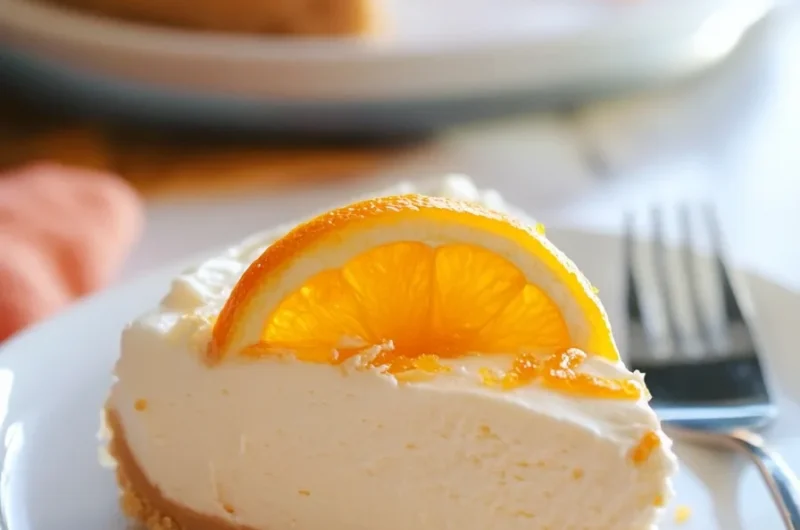
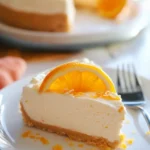
No Bake Orange Creamsicle Cheesecake is a delightful treat that combines the nostalgic flavors of a classic creamsicle with the luxurious texture of cheesecake. This dessert is perfect for those warm days when you crave something sweet but don’t want to turn on the oven. Its refreshing orange flavor intertwined with creamy goodness is guaranteed to make your taste buds sing with joy!
Imagine slicing into a cheesecake that is incredibly rich yet light, citrusy yet creamy, evoking memories of summer afternoons and sweet treats from childhood. The best part? This incredible dessert is made without baking, making it accessible for both novice and seasoned bakers alike. In this guide, you’ll find all the details you need to create this spectacular cheesecake, why it’ll capture your heart, and tips on serving it to perfection.
Whether you are hosting a gathering or just treating yourself, No Bake Orange Creamsicle Cheesecake is bound to impress—we’ll explore the reasons you will love it, share the preparation and ingredients required, and guide you through the step-by-step process to create this orange delight. So, ready your mixing bowls, and let’s make a dessert that is sure to be a hit!
Why You’ll Love This Recipe
When it comes to desserts, the No Bake Orange Creamsicle Cheesecake stands out for several reasons. Here are just a few reasons why this recipe is a must-try:
1. Easy Preparation – No baking means less hassle and more time enjoying your delicious creation.
2. Family-Friendly – Kids and adults alike will be delighted by its sweet orange flavor and creamy texture.
3. Versatile Ingredients – You can easily substitute ingredients to cater to dietary needs, like gluten-free options.
4. Beautiful Presentation – The vibrant orange and creamy layers make this cheesecake visually appealing for any occasion.
5. Perfect for Any Season – While this cheesecake is light and refreshing for summer, its orange flavor also brings warmth to winter gatherings.
6. Minimal Effort, Maximum Flavor – Simple steps yield a dessert that tastes like it came straight from a gourmet bakery.
These factors make this cheesecake an irresistible option for anyone who appreciates sweet indulgences. Each bite encapsulates summer, making it a memorable treat for all.
Preparation and Cooking Time
Preparing the No Bake Orange Creamsicle Cheesecake is a simple process that won’t take up your entire day. Here’s a breakdown of the time you can expect to spend on this delectable dessert:
– Preparation Time: 30 minutes
– Chilling Time: 4 hours (or overnight for best results)
– Total Time: Approximately 4 hours and 30 minutes
Even though the total time includes chilling, hands-on preparation is minimal. You’ll discover that the wait will be worth it when you indulge in this luscious cheesecake!
Ingredients
– For the Crust:
– 1 ½ cups graham cracker crumbs
– ½ cup unsalted butter, melted
– ¼ cup granulated sugar
– For the Cheesecake Filling:
– 16 oz cream cheese, softened
– 1 cup powdered sugar
– 1 cup heavy whipping cream
– ½ cup orange juice (freshly squeezed is best)
– Zest from 1 medium orange
– 1 tsp vanilla extract
– For Topping (Optional):
– Whipped cream
– Orange slices for garnish
– Additional orange zest
Step-by-Step Instructions
Creating the No Bake Orange Creamsicle Cheesecake is a breeze! Just follow these simple steps:
1. Prepare the Crust: In a medium mixing bowl, combine graham cracker crumbs, melted butter, and granulated sugar. Stir until the crumbs are evenly coated.
2. Form the Crust: Press the crust mixture firmly into the bottom of a 9-inch springform pan. Make sure it is evenly distributed. Set aside.
3. Beat the Cream Cheese: In a large bowl, beat the softened cream cheese with an electric mixer until creamy and smooth.
4. Add Powdered Sugar: Gradually add the powdered sugar to the cream cheese mixture, mixing until fully incorporated.
5. Incorporate Juices and Zest: Add the orange juice, orange zest, and vanilla extract to the mixture. Beat until everything is fully combined and smooth.
6. Whip the Cream: In another bowl, whip the heavy cream until stiff peaks form. This should take about 4-5 minutes.
7. Fold Cream into Mixture: Gently fold the whipped cream into the orange cream cheese mixture. Be careful to maintain the volume of the whipped cream for a light texture.
8. Fill the Crust: Pour the cheesecake filling over the prepared graham cracker crust, spreading it evenly with a spatula.
9. Chill: Cover the cheesecake with plastic wrap and refrigerate for at least 4 hours, or overnight for best results, to allow it to set properly.
10. Serve: When ready to serve, carefully remove the cheesecake from the springform pan and garnish as desired.
By following these steps, you’ll create a dessert that’s both beautiful and delicious, perfect for any occasion!
How to Serve
Serving the No Bake Orange Creamsicle Cheesecake can be just as delightful as making it! Here are some thoughtful tips to elevate your presentation:
1. Presentation Matters: Use a cake stand for an elegant look. A simple, white plate emphasizes the cheesecake’s vibrant orange color.
2. Garnish Creatively: Top your cheesecake with dollops of whipped cream, slices of fresh orange, and additional orange zest to give it a decorative appeal.
3. Slice Size: Cut the cheesecake into neat, even slices. Aim for a generous yet manageable portion that encourages seconds without overwhelming guests.
4. Add Accompaniments: Serve with fruit, such as berries or a citrus salad, to complement the orange flavor and add freshness.
5. Beverage Pairings: Offer refreshing beverages like iced tea, lemonade, or sparkling water alongside the cheesecake to enhance the summertime vibes.
When you pay attention to presentation and serving style, you’ll create an unforgettable experience for your guests—one that will leave them reminiscing about their indulgence long after the last bite!
In summary, with its extraordinary taste and inviting appearance, No Bake Orange Creamsicle Cheesecake will undoubtedly charm your palate. Enjoy making this delightful dessert, and watch it become a favorite for gatherings, celebrations, or a sweet indulgence at home.
Additional Tips
– Use Fresh Ingredients: For the best flavor, opt for fresh orange juice and zest. This will enhance the citrus profile of your No Bake Orange Creamsicle Cheesecake.
– Chill Thoroughly: Ensure you give the cheesecake enough time to chill. Ideally, overnight chilling will yield the best texture and flavor.
– Experiment with Flavors: Consider adding a splash of orange liqueur to the filling for an adult twist on this classic dessert.
– Check Consistency: If your filling seems too thick, a little extra orange juice can help achieve a smoother texture.
Recipe Variation
Feel free to make this No Bake Orange Creamsicle Cheesecake your own! Here are some variations you might enjoy:
1. Chocolate Drizzle: Drizzle melted chocolate over the top before serving for a rich flavor contrast.
2. Tropical Twist: Add crushed pineapple to the filling for a delightful Hawaiian-style cheesecake.
3. Nutty Crust: Incorporate finely crushed nuts into the crust for added texture and flavor, such as almonds or pecans.
4. Vegan Version: For a plant-based option, use vegan cream cheese and coconut whipped cream for the filling.
Freezing and Storage
– Storage: Store your No Bake Orange Creamsicle Cheesecake in the refrigerator, covered tightly with plastic wrap. It will stay fresh for up to 5 days.
– Freezing: You can freeze slices of the cheesecake for up to 3 months. Wrap them well in plastic wrap and then aluminum foil to prevent freezer burn.
Special Equipment
To prepare the No Bake Orange Creamsicle Cheesecake successfully, you’ll need a few essential tools:
– 9-inch springform pan
– Mixing bowls
– Electric mixer or hand mixer
– Spatula
– Measuring cups and spoons
– Plastic wrap for covering
Frequently Asked Questions
How can I tell if the cheesecake is set?
Check for firmness: gently shake the pan; if the filling jiggles slightly but is mostly firm, it’s ready.
Can I make this cheesecake in advance?
Absolutely! It’s perfect to prepare a day or two ahead of serving, allowing the flavors to meld beautifully.
What can I use instead of cream cheese?
For a lighter option, you can substitute Greek yogurt for cream cheese, although this will alter the flavor and texture.
Is this dessert gluten-free?
Yes, if you use gluten-free graham crackers, your cheesecake can be made gluten-free!
How do I remove the cheesecake from the springform pan?
Run a thin knife around the edges of the cheesecake before releasing the latch on the springform pan to ensure a clean release.
Conclusion
No Bake Orange Creamsicle Cheesecake is not just a dessert; it’s a delightful experience packed with flavor and nostalgia. This creamy, refreshing cheesecake is perfect for any occasion and is sure to leave a lasting impression on all who indulge in it. Easy to make and visually stunning, it’s a treat that captures the essence of summer and brings a smile to everyone’s face. Give this recipe a try and enjoy every luscious bite!
No Bake Orange Creamsicle Cheesecake: An Amazing Ultimate Recipe
- Prep Time: 15 minutes
- Cook Time: 0 minutes
- Total Time: 15 minutes
Ingredients
– For the Crust:
– 1 ½ cups graham cracker crumbs
– ½ cup unsalted butter, melted
– ¼ cup granulated sugar
– For the Cheesecake Filling:
– 16 oz cream cheese, softened
– 1 cup powdered sugar
– 1 cup heavy whipping cream
– ½ cup orange juice (freshly squeezed is best)
– Zest from 1 medium orange
– 1 tsp vanilla extract
– For Topping (Optional):
– Whipped cream
– Orange slices for garnish
– Additional orange zest
Instructions
Creating the No Bake Orange Creamsicle Cheesecake is a breeze! Just follow these simple steps:
1. Prepare the Crust: In a medium mixing bowl, combine graham cracker crumbs, melted butter, and granulated sugar. Stir until the crumbs are evenly coated.
2. Form the Crust: Press the crust mixture firmly into the bottom of a 9-inch springform pan. Make sure it is evenly distributed. Set aside.
3. Beat the Cream Cheese: In a large bowl, beat the softened cream cheese with an electric mixer until creamy and smooth.
4. Add Powdered Sugar: Gradually add the powdered sugar to the cream cheese mixture, mixing until fully incorporated.
5. Incorporate Juices and Zest: Add the orange juice, orange zest, and vanilla extract to the mixture. Beat until everything is fully combined and smooth.
6. Whip the Cream: In another bowl, whip the heavy cream until stiff peaks form. This should take about 4-5 minutes.
7. Fold Cream into Mixture: Gently fold the whipped cream into the orange cream cheese mixture. Be careful to maintain the volume of the whipped cream for a light texture.
8. Fill the Crust: Pour the cheesecake filling over the prepared graham cracker crust, spreading it evenly with a spatula.
9. Chill: Cover the cheesecake with plastic wrap and refrigerate for at least 4 hours, or overnight for best results, to allow it to set properly.
10. Serve: When ready to serve, carefully remove the cheesecake from the springform pan and garnish as desired.
By following these steps, you’ll create a dessert that’s both beautiful and delicious, perfect for any occasion!
Nutrition
- Serving Size: 10 slices
- Calories: 320 kcal
- Fat: 22g
- Protein: 4g