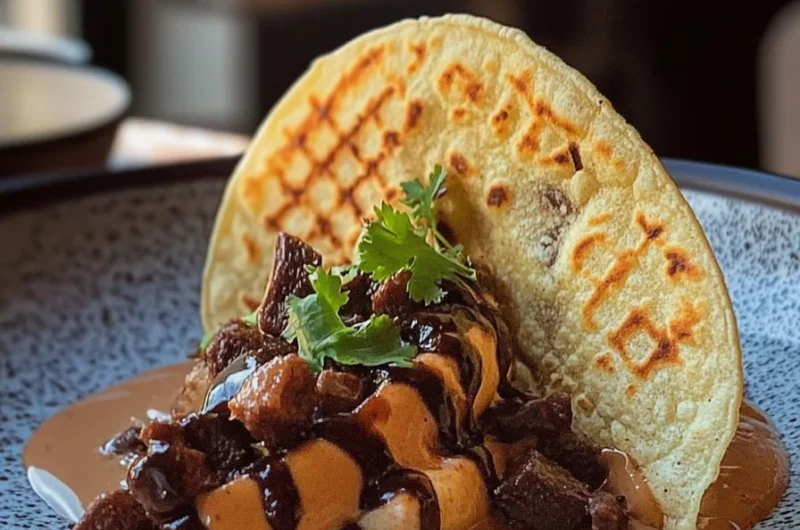
Homemade Choco Tacos is an amazing treat that combines the nostalgia of childhood with the rich flavors of chocolate and ice cream. These delightful desserts bring together a crispy taco shell filled with creamy ice cream and drizzled with a luscious chocolate coating. If you love ice cream and unique treats, you’ll find yourself absolutely captivated by these homemade delights. Imagine the joy of biting into a crunchy shell that leads you to a hidden world of creamy goodness! This dessert is not just easy to make but also perfect for any occasion, whether it’s a summer party, family gathering, or just a cozy night in.
The combination of flavors and textures in Homemade Choco Tacos creates a wonderful experience for your taste buds. Each taco offers a satisfying crunch, followed by a silky smooth interior, making it a perfect treat for anyone who has a sweet tooth. In this guide, we’ll explore why this recipe is a must-try, how you can prepare it at home, and tips on serving these fabulous desserts. Get ready to impress your friends and family with your culinary skills by bringing this incredible treat to life in your own kitchen!
Why You’ll Love This Recipe
Homemade Choco Tacos are an irresistible treat that will surely delight everyone who tries them. Here are some compelling reasons why you’ll become a fan of this recipe:
1. Customizable Flavors – You can easily switch up the ice cream flavors to suit different tastes. From classic vanilla to exotic mango or even cookie dough, the possibilities are endless.
2. Fun to Make – Crafting homemade treats is an enjoyable activity, especially when inviting friends or kids to join in. It’s a fun way to bond while getting creative in the kitchen.
3. Perfect for Any Occasion – Whether it’s a birthday party, a summer barbecue, or just a dessert for a movie night, Homemade Choco Tacos fit right in.
4. Impressive Presentation – Their unique shape and the contrast of colors will have your guests taking pictures before they take a bite.
5. Deliciously Decadent – The combination of a crispy taco shell with creamy ice cream and a rich chocolate coating is a dessert lover’s dream come true.
6. Easy to Follow Instructions – With straightforward steps, even novice cooks can easily pull off this incredible recipe.
With these enticing factors, you’ll be eager to whip up a batch of homemade Choco Tacos, and once you do, you’ll see just how amazing they are!
Preparation and Cooking Time
Creating Homemade Choco Tacos is a delightful experience that takes about 1 hour and 30 minutes in total. Here’s a breakdown of the time required:
– Preparation Time: 30 minutes
– Cooking Time: 15 minutes
– Chilling Time: 30 to 60 minutes (for the ice cream to set)
These times might vary slightly based on experience and kitchen equipment. However, this should give you a solid estimate for planning your cooking adventure.
Ingredients
– 2 cups all-purpose flour
– 1/2 cup unsweetened cocoa powder
– 1/4 cup granulated sugar
– 1/2 teaspoon salt
– 1/4 teaspoon baking powder
– 1/2 cup butter, melted
– 1/3 cup water
– 1 quart of your favorite ice cream
– 1 cup semi-sweet chocolate chips
– 1 tablespoon coconut oil (for melting chocolate)
– Sprinkles or nuts for decoration (optional)
Step-by-Step Instructions
Creating Homemade Choco Tacos is simple with these easy-to-follow steps:
1. Prepare the Taco Shells: In a mixing bowl, combine the flour, cocoa powder, sugar, salt, and baking powder. Stir until well mixed.
2. Add Wet Ingredients: Pour in the melted butter and water, then mix until a smooth dough forms.
3. Shape the Dough: Divide the dough into small portions, approximately the size of a golf ball. Roll each portion into a flat circle about 1/4 inch thick.
4. Cook the Shells: Preheat a non-stick skillet over medium heat. Cook each dough circle for about 1 minute on each side until set but not overcooked. Use a spatula to shape the dough into taco shells and let cool.
5. Fill with Ice Cream: Once cooled, fill each taco shell with a scoop of your favorite ice cream. Place filled shells in the freezer for about 30 minutes to firm up.
6. Melt the Chocolate: In a microwave-safe bowl, combine the chocolate chips and coconut oil. Heat in 30-second intervals, stirring until melted and smooth.
7. Coat the Tacos: Dip each taco into the melted chocolate, ensuring the edges and the bottom are covered. Allow excess chocolate to drip off.
8. Add Toppings: Before the chocolate hardens, sprinkle your choice of decorative toppings like nuts or sprinkles onto the chocolate.
9. Set the Tacos: Place the coated tacos on parchment paper and return them to the freezer for an additional 30 minutes for the chocolate to set.
10. Serve and Enjoy: Remove from the freezer when ready to serve, and enjoy your delightful Homemade Choco Tacos!
How to Serve
To elevate the experience of serving your Homemade Choco Tacos, consider these tips:
1. Presentation: Arrange the Choco Tacos on a beautiful platter or tiered stand to create an appealing visual display.
2. Accompanying Items: Consider serving with additional sauces like caramel or chocolate syrup on the side for drizzling.
3. Creative Garnishes: A sprinkle of powdered sugar or a dollop of whipped cream can add an elegant touch.
4. Serving Temperature: Serve them immediately after removing from the freezer for the best texture and flavor.
5. Beverage Pairing: Complement your Choco Tacos with refreshing drinks like milkshakes, iced coffee, or fruity iced tea for a perfect dessert combo.
By putting thought into the serving process, you’ll enhance the overall enjoyment of these delicious treats, making them a memorable experience for everyone involved!
Additional Tips
– Use Quality Ingredients: The flavor of your Homemade Choco Tacos can greatly benefit from using high-quality cocoa powder and chocolate chips. It enhances the overall taste and makes a noticeable difference.
– Experiment with Toppings: Get creative with toppings! Try crushed cookies, mini marshmallows, or even drizzles of caramel sauce for an added dimension of flavor.
– Chill Thoroughly: After filling the taco shells with ice cream, allow them to chill longer in the freezer if possible. This ensures they hold their shape better when dipped in chocolate.
– Serve Fresh: While they can be stored, Homemade Choco Tacos taste best when enjoyed soon after finishing all steps for the richest flavors and textures.
Recipe Variation
Feel free to get inventive with your Homemade Choco Tacos! Here are some variations to try:
1. Frozen Yogurt Version: Swap your ice cream for frozen yogurt to create a lighter treat that’s just as delicious.
2. Crunchy Caramel Layer: Add a layer of crunchy caramel bits in addition to the ice cream for a delightful surprise in every bite.
3. Fruit-Flavored Ice Cream: Try different flavors of fruit-based ice cream like strawberry or raspberry for a refreshing twist.
4. Nutty Chocolate: Incorporate nuts into your melted chocolate coating for an extra crunch and flavor.
Freezing and Storage
– Storage: To keep your Homemade Choco Tacos fresh, store them in an airtight container in the freezer. They should stay fresh for about 1-2 weeks.
– Freezing: If you have leftover taco shells or ice cream, you can freeze them separately. The taco shells can last several weeks, while ice cream can remain fresh for up to a month if stored properly.
Special Equipment
Having the right tools makes preparing Homemade Choco Tacos easier and more efficient. Here’s what you’ll need:
– Non-stick skillet: For cooking the taco shells without them sticking.
– Mixing bowls: To combine dry and wet ingredients.
– Spatula: To help in shaping the taco shells in the skillet.
– Microwave-safe bowl: For melting the chocolate and coconut oil.
– Parchment paper: For setting the coated tacos to prevent sticking.
Frequently Asked Questions
Can I make the taco shells in advance?
Yes! You can prepare the taco shells a day before and store them in an airtight container.
Can I use store-bought ice cream?
Absolutely! Store-bought ice cream works perfectly for this recipe. Choose your favorite flavor.
What’s the best way to melt the chocolate?
Using a microwave in short intervals is effective. Stir after each interval until completely melted.
Can I make a gluten-free version?
Yes, you can replace all-purpose flour with a gluten-free flour blend to cater to gluten sensitivities.
How do I keep the chocolate coating from cracking?
Make sure the chocolate is thoroughly melted and warm. Allow the coated tacos to set in the freezer more evenly.
Conclusion
Homemade Choco Tacos are a delightful treat that unites the best of both chocolate and ice cream worlds. The crunchy taco shell combined with the creamy ice cream and a rich chocolate coating creates an incredibly satisfying dessert. Not only do they taste amazing, but they also offer a fun project for the whole family, letting everyone join in on the process. Whether for a special occasion or just a sweet indulgence at home, these tacos are sure to become a new favorite. So gather your ingredients, put on your apron, and enjoy the process of creating these delightful delights!
Homemade Choco Tacos: An Incredible Ultimate Recipe
- Prep Time: 15 minutes
- Cook Time: 15 minutes
- Total Time: 30 minutes
Ingredients
– 2 cups all-purpose flour
– 1/2 cup unsweetened cocoa powder
– 1/4 cup granulated sugar
– 1/2 teaspoon salt
– 1/4 teaspoon baking powder
– 1/2 cup butter, melted
– 1/3 cup water
– 1 quart of your favorite ice cream
– 1 cup semi-sweet chocolate chips
– 1 tablespoon coconut oil (for melting chocolate)
– Sprinkles or nuts for decoration (optional)
Instructions
Creating Homemade Choco Tacos is simple with these easy-to-follow steps:
1. Prepare the Taco Shells: In a mixing bowl, combine the flour, cocoa powder, sugar, salt, and baking powder. Stir until well mixed.
2. Add Wet Ingredients: Pour in the melted butter and water, then mix until a smooth dough forms.
3. Shape the Dough: Divide the dough into small portions, approximately the size of a golf ball. Roll each portion into a flat circle about 1/4 inch thick.
4. Cook the Shells: Preheat a non-stick skillet over medium heat. Cook each dough circle for about 1 minute on each side until set but not overcooked. Use a spatula to shape the dough into taco shells and let cool.
5. Fill with Ice Cream: Once cooled, fill each taco shell with a scoop of your favorite ice cream. Place filled shells in the freezer for about 30 minutes to firm up.
6. Melt the Chocolate: In a microwave-safe bowl, combine the chocolate chips and coconut oil. Heat in 30-second intervals, stirring until melted and smooth.
7. Coat the Tacos: Dip each taco into the melted chocolate, ensuring the edges and the bottom are covered. Allow excess chocolate to drip off.
8. Add Toppings: Before the chocolate hardens, sprinkle your choice of decorative toppings like nuts or sprinkles onto the chocolate.
9. Set the Tacos: Place the coated tacos on parchment paper and return them to the freezer for an additional 30 minutes for the chocolate to set.
10. Serve and Enjoy: Remove from the freezer when ready to serve, and enjoy your delightful Homemade Choco Tacos!
Nutrition
- Serving Size: 8 tacos
- Calories: 300 kcal
- Fat: 15g
- Protein: 5g
