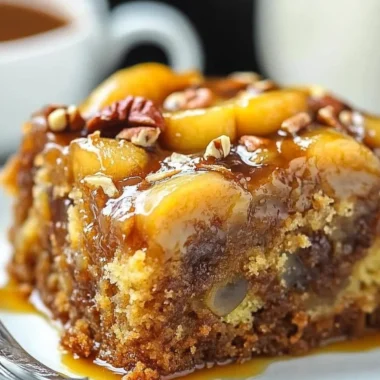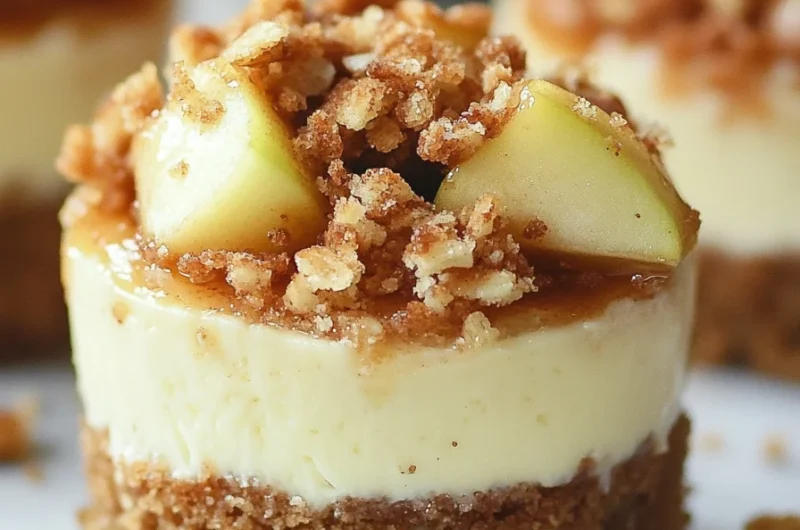
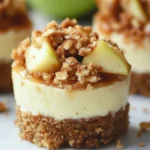
Apple Crisp Mini Cheesecakes are a delightful way to combine the rich flavors of cheesecake with the comforting essence of apple crisp. This incredible dessert brings warmth and coziness to your table, making it perfect for gatherings, holidays, or simply as a sweet treat for yourself. The layers of smooth cheesecake, topped with vibrant apples and a crumbly streusel, create a perfect balance that everyone will cherish.
Imagine biting into a smooth, creamy cheesecake, enriched with cinnamon-spiced apples and a crunchy topping that simply melts in your mouth. This dessert isn’t just a feast for your taste buds; it’s a presentation that will impress your friends and family. These mini cheesecakes offer a modern twist on a classic favorite, showcasing the true beauty of seasonal ingredients.
In this article, we will explore why you’ll love this recipe, how to prepare it, the essential ingredients, detailed steps for making it, and finally, how to serve these delightful Apple Crisp Mini Cheesecakes. Get ready to impress your guests with this amazing and memorable dessert that is sure to be a crowd-pleaser!
Why You’ll Love This Recipe
Apple Crisp Mini Cheesecakes offer an extraordinary blend of flavors and textures that stands out from traditional desserts. Here are several reasons why this recipe is bound to become a favorite in your baking repertoire:
1. Individual Portions: The mini size makes for perfect portion control, so everyone can enjoy their own cheesecake.
2. Simple to Make: With clear steps and easily accessible ingredients, even novice bakers can successfully create these treats.
3. Seasonal Ingredients: Incorporating fresh apples and spices captures the essence of fall, making these cheesecakes especially delightful during autumn.
4. Versatile Flavors: Feel free to customize the ingredients to suit your taste, such as using different fruits or adding nuts.
5. Impressive Presentation: The layers of cheesecake, apple filling, and streusel topping create a visually appealing dessert that will wow your guests.
6. Deliciously Satisfying: Each bite provides a creamy texture balanced against the crispness of the apple topping, making it an unforgettable experience.
These factors reveal why Apple Crisp Mini Cheesecakes are not only appealing but also incredibly rewarding to make and serve!
Preparation and Cooking Time
Preparing Apple Crisp Mini Cheesecakes is a delightful process that requires some time, but the end result is worth every minute. Here’s a breakdown of the time involved:
– Preparation Time: 30 minutes
– Cooking Time: 20-25 minutes
– Cooling Time: 1 hour
– Total Time: Approximately 2 hours
While these times may vary depending on your kitchen efficiency, this overview provides a solid estimate to help you schedule your baking.
Ingredients
– For the Crust:
– 1 cup graham cracker crumbs
– 2 tablespoons granulated sugar
– 4 tablespoons unsalted butter, melted
– For the Cheesecake Filling:
– 16 ounces cream cheese, softened
– ½ cup granulated sugar
– 2 large eggs
– 1 teaspoon vanilla extract
– 1 teaspoon ground cinnamon
– For the Apple Filling:
– 2 medium apples, peeled, cored, and diced
– ¼ cup brown sugar
– ½ teaspoon ground cinnamon
– 1 tablespoon lemon juice
– For the Streusel Topping:
– ½ cup rolled oats
– ½ cup all-purpose flour
– 1/3 cup brown sugar
– ¼ teaspoon ground cinnamon
– 4 tablespoons unsalted butter, melted
Step-by-Step Instructions
To create these delightful Apple Crisp Mini Cheesecakes, follow these straightforward steps:
1. Preheat the Oven: Preheat your oven to 325°F (165°C).
2. Prepare the Muffin Tin: Line a standard muffin tin with cupcake liners for easy removal of the mini cheesecakes.
3. Make the Crust: In a bowl, combine graham cracker crumbs, granulated sugar, and melted butter. Stir until the mixture resembles wet sand.
4. Fill the Muffin Tin: Divide the crust mixture evenly among the muffin cups, pressing it down firmly to form a solid base.
5. Bake the Crust: Bake the crusts in the preheated oven for about 5 minutes. Remove and allow to cool slightly.
6. Prepare the Cheesecake Filling: In a large bowl, beat the softened cream cheese and granulated sugar together until smooth and creamy.
7. Add Eggs and Flavor: Add the eggs one at a time, mixing well after each addition. Stir in the vanilla extract and cinnamon until fully combined.
8. Fill the Cups: Pour the cheesecake filling over the crusts in the muffin tin, filling each cup about three-quarters full.
9. Prepare the Apple Filling: In a separate bowl, toss the diced apples with brown sugar, cinnamon, and lemon juice until well coated.
10. Add Apple Topping: Spoon the apple mixture evenly on top of the cheesecake filling in each muffin cup.
11. Make the Streusel Topping: In another bowl, mix oats, flour, brown sugar, cinnamon, and melted butter until crumbly.
12. Sprinkle Streusel: Generously sprinkle the streusel topping over the apples in each cup.
13. Bake: Bake in the oven for 20-25 minutes, or until the cheesecake is set and the tops are lightly golden.
14. Cool the Cheesecakes: Remove from the oven and let the cheesecakes cool in the tin for about 10 minutes before transferring to a wire rack.
15. Chill: After cooling, refrigerate for at least 1 hour before serving to allow the flavors to meld.
Now you have delicious Apple Crisp Mini Cheesecakes ready to enjoy!
How to Serve
Serving these delightful Apple Crisp Mini Cheesecakes can elevate the overall experience. Consider the following tips to make the presentation special:
1. Plating: Place the mini cheesecakes on a decorative platter to enhance their appearance.
2. Garnish Options: Add a dollop of whipped cream or a scoop of vanilla ice cream on top for extra indulgence.
3. Accompaniments: Serve with a drizzle of caramel sauce or a sprinkle of cinnamon for added sweetness.
4. Personal Touches: Consider adding a sprig of mint or finely chopped nuts for added texture.
5. Serving Temperature: These cheesecakes can be served chilled or at room temperature—both are delicious!
Enhancing the serving experience will help your Apple Crisp Mini Cheesecakes shine, leaving a lasting impression on your guests and making every occasion feel special!
Additional Tips
– Use Fresh Apples: Fresh apples lead to the best flavor. Choose varieties like Granny Smith or Honeycrisp for that perfect balance of sweetness and tartness.
– Let the Cheesecakes Cool Completely: Cooling is essential before refrigerating. This ensures the cheesecakes set properly and the flavors meld together beautifully.
– Customize Your Toppings: Experiment with different toppings. Try crushed nuts or drizzles of caramel for added flair.
– Serve Chilled: For the best taste, serve these cheesecakes chilled. This enhances the richness of the filling.
Recipe Variation
Feel free to get creative! Here are some delightful variations to consider:
1. Different Fruits: Substitute the apples with pears or peaches for a unique twist on the flavor profile.
2. Add Spices: Incorporate nutmeg or ginger into the apple filling for an extra layer of warmth.
3. Mini Pumpkin Cheesecakes: Replace the apple filling with a pumpkin mixture for a seasonal fall treat.
4. Dairy-Free Option: Use dairy-free cream cheese and butter for a lactose-free version of this dessert.
Freezing and Storage
– Storage: Keep the mini cheesecakes in an airtight container in the refrigerator. They can last up to 5 days.
– Freezing: These cheesecakes also freeze well. Wrap each mini cheesecake tightly in plastic wrap and aluminum foil. They can be stored in the freezer for up to 3 months. Just thaw them in the refrigerator overnight before serving.
Special Equipment
You’ll need a few essential tools to make your Apple Crisp Mini Cheesecakes:
– Muffin tin: For baking the mini cheesecakes.
– Cupcake liners: To line the muffin tin for easy removal.
– Mixing bowls: For blending the crust, filling, and toppings.
– Electric mixer: Ideal for beating the cream cheese filling to a smooth consistency.
– Measuring cups and spoons: For accurate ingredient measurements.
Frequently Asked Questions
Can I use a different type of crust?
Yes, you can try using crushed wafers or even a cookie crust for a different taste.
What if I don’t have a muffin tin?
You could use a baking dish and bake it as a single cheesecake. Just adjust baking time accordingly.
How do I know when the cheesecakes are done?
The cheesecakes should be set but may still have a slight jiggle in the center. They will firm up as they cool.
Can I use store-bought applesauce instead of making the apple filling?
Yes, store-bought applesauce can save time, although it may alter the texture slightly.
How can I make these cheesecakes gluten-free?
Use gluten-free graham crackers for the crust and ensure all other ingredients are gluten-free.
Conclusion
Apple Crisp Mini Cheesecakes are a fantastic dessert that beautifully combines flavors and textures. Their individual servings make them an attractive choice for gatherings and celebrations. Whether you’re preparing them for a casual get-together or a special occasion, these cheesecakes are sure to impress. With their delicious taste and stunning presentation, they will quickly become a favorite among your family and friends.
Apple Crisp Mini Cheesecakes: An Amazing Ultimate Recipe
- Prep Time: 30 minutes
- Cook Time: 20-25 minutes
- Total Time: 11 minute
Ingredients
– For the Crust:
– 1 cup graham cracker crumbs
– 2 tablespoons granulated sugar
– 4 tablespoons unsalted butter, melted
– For the Cheesecake Filling:
– 16 ounces cream cheese, softened
– ½ cup granulated sugar
– 2 large eggs
– 1 teaspoon vanilla extract
– 1 teaspoon ground cinnamon
– For the Apple Filling:
– 2 medium apples, peeled, cored, and diced
– ¼ cup brown sugar
– ½ teaspoon ground cinnamon
– 1 tablespoon lemon juice
– For the Streusel Topping:
– ½ cup rolled oats
– ½ cup all-purpose flour
– 1/3 cup brown sugar
– ¼ teaspoon ground cinnamon
– 4 tablespoons unsalted butter, melted
Instructions
To create these delightful Apple Crisp Mini Cheesecakes, follow these straightforward steps:
1. Preheat the Oven: Preheat your oven to 325°F (165°C).
2. Prepare the Muffin Tin: Line a standard muffin tin with cupcake liners for easy removal of the mini cheesecakes.
3. Make the Crust: In a bowl, combine graham cracker crumbs, granulated sugar, and melted butter. Stir until the mixture resembles wet sand.
4. Fill the Muffin Tin: Divide the crust mixture evenly among the muffin cups, pressing it down firmly to form a solid base.
5. Bake the Crust: Bake the crusts in the preheated oven for about 5 minutes. Remove and allow to cool slightly.
6. Prepare the Cheesecake Filling: In a large bowl, beat the softened cream cheese and granulated sugar together until smooth and creamy.
7. Add Eggs and Flavor: Add the eggs one at a time, mixing well after each addition. Stir in the vanilla extract and cinnamon until fully combined.
8. Fill the Cups: Pour the cheesecake filling over the crusts in the muffin tin, filling each cup about three-quarters full.
9. Prepare the Apple Filling: In a separate bowl, toss the diced apples with brown sugar, cinnamon, and lemon juice until well coated.
10. Add Apple Topping: Spoon the apple mixture evenly on top of the cheesecake filling in each muffin cup.
11. Make the Streusel Topping: In another bowl, mix oats, flour, brown sugar, cinnamon, and melted butter until crumbly.
12. Sprinkle Streusel: Generously sprinkle the streusel topping over the apples in each cup.
13. Bake: Bake in the oven for 20-25 minutes, or until the cheesecake is set and the tops are lightly golden.
14. Cool the Cheesecakes: Remove from the oven and let the cheesecakes cool in the tin for about 10 minutes before transferring to a wire rack.
15. Chill: After cooling, refrigerate for at least 1 hour before serving to allow the flavors to meld.
Now you have delicious Apple Crisp Mini Cheesecakes ready to enjoy!
Nutrition
- Serving Size: 12 mini cheesecakes
- Calories: 220 kcal
- Fat: 10g
- Protein: 4g