Chocolate covered Oreos are a simple yet delicious treat. This guide shows how to make them, decorate them, and store them properly.
Decadent Chocolate Covered Oreos: A Simple Delight
Chocolate-covered Oreos are a timeless treat that’s not only easy to make but also incredibly fun to decorate, making them a favorite among people of all ages. This detailed guide will walk you through every step, from gathering the essential ingredients to mastering the process of creating these delightful snacks at home. Along the way, you’ll discover decorating ideas, tips for proper storage, and answers to frequently asked questions to ensure your success. For even more homemade sweetness, don’t miss our recipe for Delicious Homemade Wafer Cookies, a perfect complement to these chocolatey delights!
Gathering Your Ingredients for Chocolate Covered Oreos
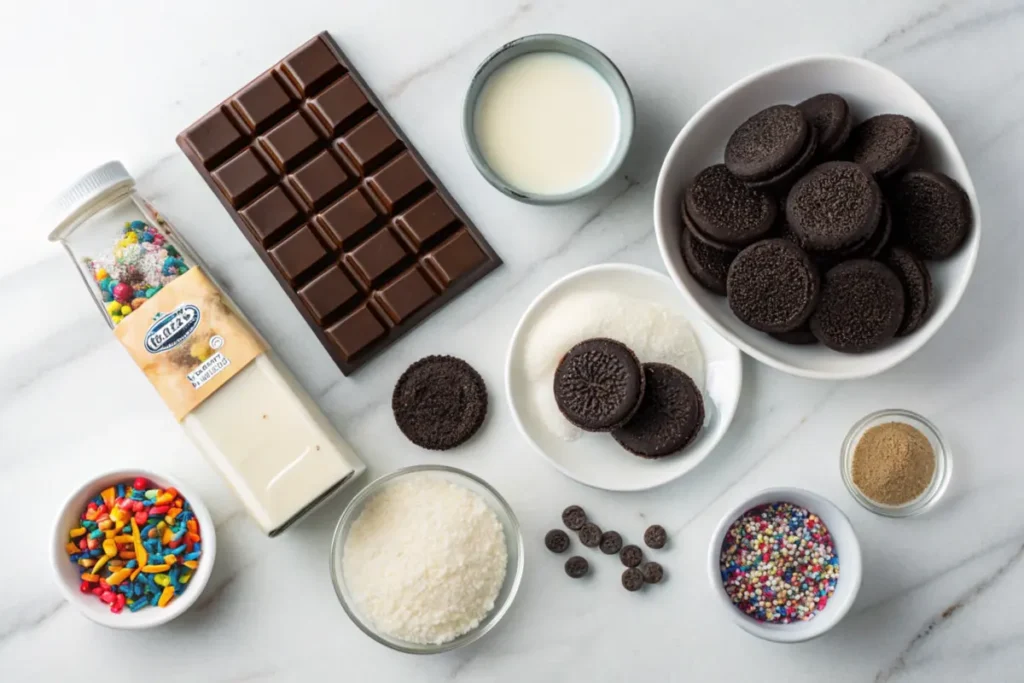
Before you begin, you need to gather all the necessary ingredients. Moreover, having everything on hand will make the process smoother.
Ingredients:
- 1 package (14.3 oz) Oreo cookies
- 12 oz semi-sweet chocolate chips (or candy melts)
- 12 oz white chocolate chips (or candy melts)
- Optional: Sprinkles, crushed candies, or drizzle for decoration
Choosing the Right Chocolate
The type of chocolate you choose can significantly impact the taste and texture of your chocolate covered Oreos. Therefore, consider the following options:
Milk Chocolate
Milk chocolate is a popular choice. Basically, it has a creamy texture and sweet flavor. However, it melts easily. It is also perfect for those who prefer a classic chocolate taste.
Dark Chocolate
Dark chocolate offers a richer, more intense flavor. Generally, it has a higher cocoa content and less sugar than milk chocolate. As a result, it is a good option for those who enjoy a slightly bitter taste.
White Chocolate
White chocolate is sweet and creamy, though technically not chocolate.

Preparing Your Ingredients for Chocolate Covered Oreos
Proper preparation is key to a smooth and successful process. As a result, follow these steps to prepare your ingredients:
Setting Up Your Workspace
First, clear a large, flat surface to work on. Second, cover it with parchment paper or wax paper. This will be where you set your chocolate covered Oreos to harden. Then, gather all your ingredients and tools. Finally, place them within easy reach.
Instructions:
Transfer the chocolate-covered Oreos to an airtight container. Store in a cool, dry place or in the fridge for up to 1 week.
Prepare workspace: Line a baking sheet with parchment paper or a silicone baking mat.
Melt chocolate:
Place the semi-sweet chocolate in a microwave-safe bowl. Heat in 20-second intervals, stirring after each, until smooth and melted. Repeat with white chocolate in a separate bowl.
Dip Oreos:
Use a fork to dip each Oreo into the melted chocolate, fully coating it. Let excess chocolate drip off before placing the cookie on the prepared baking sheet.
Decorate:
Before the chocolate hardens, sprinkle with decorations or drizzle with contrasting melted chocolate.
Set the chocolate:
Place the baking sheet in the refrigerator for 15–20 minutes or until the chocolate is firm.
Serve or store:
Decorating Your Chocolate Covered Oreos
Decorating is the fun part where you can let your creativity shine. Consequently, here are some ideas to get you started.
Using Sprinkles
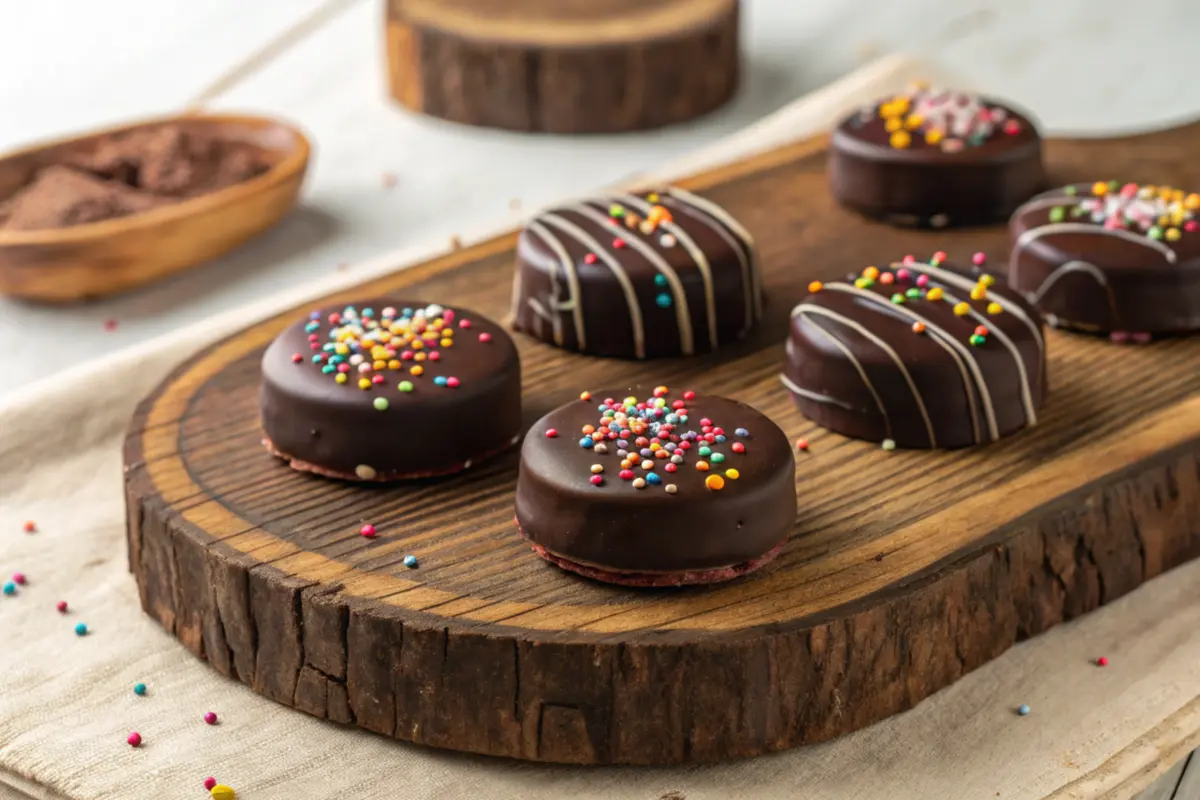
Sprinkles are a simple way to add color and texture. However, after dipping the Oreo in chocolate, sprinkle them generously over the wet chocolate. Press them gently to ensure they stick.
Creating Drizzles
Drizzles add a professional touch to your chocolate covered Oreos. Melt a different type of chocolate or colored candy melts. Then, using a spoon or a piping bag, drizzle the melted chocolate over the cooled Oreos.
Adding Nuts and Other Toppings
Chopped nuts, such as almonds, peanuts, or pecans, add a nice crunch. They can also add flavor. Sprinkle them over the wet chocolate or press them into the surface. Moreover, shredded coconut, mini chocolate chips, or even crushed candy canes are also great additions.
Advanced Decoration Techniques
For those who want to take their decorating skills to the next level, here are some advanced techniques.
Using Multiple Chocolate Types for Chocolate Covered Oreos
Create a marbled effect by using more than one type of chocolate. First, dip the Oreo in one type of chocolate. Second, drizzle a different type of melted chocolate over the top. Finally, use a toothpick to swirl the colors together.
Adding Edible Decorations
Edible decorations, such as gold leaf, edible glitter, or sugar pearls, can elevate your chocolate covered Oreos. Apply these decorations while the chocolate is still wet. Use tweezers for precise placement.
Using Molds
While this guide focuses on dipping Oreos without a mold, using a silicone mold can create beautifully shaped treats. Pour a layer of melted chocolate into the mold, place an Oreo on top, and cover with more chocolate. Chill until set, then pop them out of the mold.
Special Occasion Ideas
Chocolate covered Oreos can be customized. This can be for any special occasion, making them a versatile treat for celebrations.
Holidays
For holidays like Christmas, use red and green sprinkles. You can also create designs like Christmas trees or snowflakes with melted white chocolate. Another idea is to make them for Halloween. Use orange and black sprinkles. You can also pipe on spooky designs like spider webs or ghost faces.
Birthdays
On birthdays, use the person’s favorite colors for sprinkles and drizzles. You can also write their name or age on the Oreos. A piping bag with melted chocolate can help to do this.
Weddings
For weddings, create elegant designs with white chocolate. Also use edible pearls. Gold or silver leaf can add a touch of sophistication. You can also match the decorations to the wedding colors.
Variations and Flavor Combinations
Beyond the classic chocolate covered Oreos, you can experiment with various flavors.
Adding Extracts
Adding a few drops of flavor extracts to the melted chocolate can transform the taste. Peppermint, vanilla, almond, or orange extracts are popular choices. Thus, they add a unique twist to the classic recipe.
Using Flavored Oreos
Experimenting with different flavored Oreos can also yield delicious results. Mint, peanut butter, or birthday cake Oreos can be used. Furthermore, they add another layer of flavor to the treat.
Incorporating Spices
Adding spices to the melted chocolate can create warm and inviting flavors. Cinnamon, nutmeg, or a pinch of chili powder can add a unique twist. This makes your chocolate covered Oreos stand out.
Cooling and Setting Your Chocolate Covered Oreos
After decorating, it is crucial to let the chocolate covered Oreos cool and set properly.
Room Temperature Cooling
Place the decorated Oreos on the parchment paper at room temperature. Allow them to set for about 30 minutes to an hour. This method works well in cooler environments.
Refrigeration
For faster setting, place the Oreos in the refrigerator. They should be ready in about 15-20 minutes. However, be mindful that refrigeration can sometimes cause chocolate to “bloom,” resulting in a whitish film. This does not affect the taste but may alter the appearance.
Freezing
Freezing is another option for quick setting. Place the Oreos in the freezer for about 10 minutes. This method is ideal if you are in a hurry.
Storing Your Chocolate Covered Oreos
Proper storage is essential to maintain the freshness and quality of your chocolate covered Oreos.
Short-Term Storage
For short-term storage, keep the Oreos in an airtight container at room temperature. They should last for up to a week. Nevertheless, avoid placing them in direct sunlight or near heat sources.
Long-Term Storage
For longer storage, you can refrigerate or freeze the Oreos. In the refrigerator, they will last for about two weeks. In the freezer, they can last for up to two months. Ensure they are in an airtight container to prevent moisture and odors from affecting the chocolate.
Tips for Perfect Chocolate Covered Oreos
Here are some additional tips to help you achieve perfect results every time.
Using Quality Ingredients
Using high-quality chocolate and fresh Oreos can make a big difference in the final product. Therefore, opt for brands you trust for the best flavor and texture.
Working Quickly
Chocolate can start to set quickly, especially in a cool environment. Work efficiently. This is to ensure a smooth, even coating on each Oreo.
Avoiding Common Mistakes in Chocolate Covered Oreos
Common mistakes include overheating the chocolate. Another one is not allowing the Oreos to cool completely. Consequently, using too much chocolate can make the treats overly thick. Another one is using the wrong type of chocolate for your taste preference.
Getting Creative with Flavors
Experiment with different flavor combinations. Adding a drop of peppermint extract to the chocolate can create a festive treat. Meanwhile, a sprinkle of sea salt can enhance the sweetness of the chocolate.
Serving and Enjoying Your Chocolate Covered Oreos
Chocolate covered Oreos are a versatile treat. They can be enjoyed in many ways.
As a Snack
They are perfect as a quick and easy snack. Enjoy them with a glass of milk or a cup of coffee.
For Parties and Events
Chocolate covered Oreos are a great addition to any party or event. Arrange them on a platter for a visually appealing display.
As Gifts
These treats make wonderful homemade gifts. Package them in decorative boxes or bags. They are great for holidays, birthdays, or just because.
Conclusion
Chocolate covered Oreos are a delightful treat. They are easy to make and fun to decorate. Moreover, with the right ingredients and a little creativity, you can create a delicious dessert. It will impress your friends and family. This guide has provided you with all the information you need. You can make the perfect batch of chocolate covered Oreos. This includes choosing the right chocolate, preparing your ingredients, dipping and decorating techniques. In addition, it has storage tips and serving suggestions. Enjoy your homemade treats!
Frequently Asked Questions
How long will chocolate covered Oreos last?
Chocolate covered Oreos can last for up to a week at room temperature. They are in an airtight container. Comparatively, in the refrigerator, they can last for about two weeks. In the freezer, they will last for up to two months.
How many calories are in 1 chocolate covered Oreo?
The calorie count can vary depending on the type of chocolate used. However, a typical chocolate covered Oreo contains approximately 90-120 calories.
Are chocolate Oreos healthy?
Chocolate covered Oreos are a treat and should be enjoyed in moderation. They are not particularly healthy. This is due to their sugar and fat content. However, using dark chocolate can add some antioxidants.
How to dip Oreos in chocolate without a mold?
To dip Oreos in chocolate without a mold, use a fork to lower the Oreo into the melted chocolate. Then, cover it completely. Lift it out. Let the excess chocolate drip off. Place it on parchment paper to cool and set.
More Recipes to Try
If you loved this , be sure to check out some of our other delicious and creative recipes:
Print
Chocolate Covered Oreos
- Total Time: 20 minutes
- Yield: 24 chocolate-covered Oreos 1x
- Diet: Vegetarian
Description
These Chocolate Covered Oreos are the ultimate sweet treat! Perfect for holidays, parties, or as a fun gift idea, this simple recipe combines creamy chocolate with the classic crunch of Oreo cookies. Customize with sprinkles, drizzle, or other toppings for a festive touch.
Ingredients
- 1 package (14.3 oz) Oreo cookies
- 12 oz semi-sweet chocolate chips (or candy melts)
- 12 oz white chocolate chips (or candy melts)
- Optional: Sprinkles, crushed candies, or drizzle for decoration
Instructions
- Prepare workspace: Line a baking sheet with parchment paper or a silicone baking mat.
- Melt chocolate:
- Place the semi-sweet chocolate in a microwave-safe bowl. Heat in 20-second intervals, stirring after each, until smooth and melted. Repeat with white chocolate in a separate bowl.
- Dip Oreos:
- Use a fork to dip each Oreo into the melted chocolate, fully coating it. Let excess chocolate drip off before placing the cookie on the prepared baking sheet.
- Decorate:
- Before the chocolate hardens, sprinkle with decorations or drizzle with contrasting melted chocolate.
- Set the chocolate:
- Place the baking sheet in the refrigerator for 15–20 minutes or until the chocolate is firm.
- Serve or store:
- Transfer the chocolate-covered Oreos to an airtight container. Store in a cool, dry place or in the fridge for up to 1 week.
Notes
- Use high-quality chocolate for the best flavor.
- Customize for holidays with seasonal colors and themed toppings.
- For a smoother finish, add 1 teaspoon of coconut oil to the melted chocolate.
- Prep Time: 10 minutes
- Cook Time: 10 minutes
- Category: Dessert, Snack
- Method: No-bake, Dipping
- Cuisine: American
Nutrition
- Serving Size: per cookie
- Calories: 120
- Sugar: 12g
- Sodium: 70mg
- Fat: 6g
- Saturated Fat: 3.5g
- Carbohydrates: 16g
- Fiber: 1g
- Protein: 1g
- Cholesterol: 2mg

