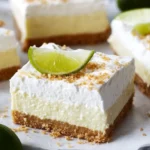
Key Lime Pie Bars are an amazing treat that captures the essence of the classic Key Lime Pie in a convenient bar form. This dessert is zesty, creamy, and perfectly sweet, making it a fantastic option for any gathering or personal indulgence. Each bite is a delightful explosion of citrus goodness that balances refreshing tartness with rich creaminess. These bars offer a convenient way to savor the iconic flavors of Key Lime Pie without the fuss of traditional pie crusts and slicing.
If you’re a fan of the refreshing taste of lime, you’re in for a real treat! The combination of a buttery graham cracker crust and the zesty lime filling is not just delicious; it evokes a sense of sunshine and warm beaches. Whether you’re preparing for a summer barbecue, a holiday gathering, or simply craving something sweet, these Key Lime Pie Bars are sure to impress. In this article, you’ll discover why this recipe stands out, how to prepare it, and tips for serving it in style.
With their vibrant color and irresistible aroma, Key Lime Pie Bars are not just a dessert; they are an experience that captures the spirit of the ocean. Prepare to wow your friends and family with this incredible recipe that is bound to become a new favorite!
Why You’ll Love This Recipe
Key Lime Pie Bars combine simplicity and flavor in a way that few desserts can achieve. Let’s explore the reasons why you’ll fall head over heels for this delightful treat:
1. Easy to Make: The steps are straightforward, making this a great recipe for novice bakers.
2. Rich Flavor: The essence of the key lime shines through, delivering a tart and sweet experience.
3. Perfect for Sharing: Ideal for parties and gatherings, these bars are easy to cut and serve.
4. No Special Equipment Needed: Just basic kitchen tools and ingredients are required.
5. Versatile Dessert: These bars can be served chilled or at room temperature, offering flexibility for any occasion.
6. Beautiful Presentation: Their bright yellow-green color topped with whipped cream is sure to impress.
Incorporating these factors, it’s easy to see why everyone loves Key Lime Pie Bars. Each bite is a harmonious blend of flavors that brings a smile to your face and a burst of happiness to your taste buds.
Preparation and Cooking Time
Making Key Lime Pie Bars is a breeze! Here’s a breakdown of how much time you’ll need to prepare and cook:
– Preparation Time: 20 minutes
– Cooking Time: 25-30 minutes
– Cooling Time: 2 hours
– Total Time: About 3 hours
Keep in mind that the cooling time is crucial for the bars to set properly and achieve the ideal texture.
Ingredients
– For the crust:
– 1 ½ cups graham cracker crumbs
– ½ cup granulated sugar
– ½ cup unsalted butter, melted
– For the filling:
– 4 large egg yolks
– 1 can (14 ounces) sweetened condensed milk
– ½ cup key lime juice (fresh or bottled)
– Zest of 2 key limes (or regular limes)
– For serving:
– Whipped cream (optional)
– Lime slices for garnish (optional)
Step-by-Step Instructions
Creating these Key Lime Pie Bars is a simple process that follows these easy steps:
1. Preheat the Oven: Preheat your oven to 350°F (175°C).
2. Prepare the Crust: In a medium bowl, combine graham cracker crumbs, granulated sugar, and melted butter. Mix until well combined.
3. Form the Crust: Press the mixture evenly into the bottom of a greased 8×8 inch baking dish. Flatten it with the back of a measuring cup or your fingers to create an even layer.
4. Bake the Crust: Place the dish in the preheated oven and bake for about 10 minutes, until slightly golden. Remove from the oven and let it cool.
5. Make the Filling: In a large bowl, whisk together the egg yolks until they’re light in color. Then, add in the sweetened condensed milk and mix until combined.
6. Add Lime Juice and Zest: Gradually add the key lime juice and lime zest to the mixture, stirring gently until everything is well combined.
7. Pour Filling Over Crust: Pour the filling into the cooled crust, spreading it evenly.
8. Bake Again: Return the dish to the oven and bake for another 15-20 minutes, just until the filling is set.
9. Cool the Bars: Remove from the oven and allow the bars to cool at room temperature for about 30 minutes. Then transfer to the refrigerator and chill for at least 1.5 to 2 hours to allow them to set completely.
10. Slice and Serve: Once chilled, cut the bars into squares and, if desired, serve with whipped cream and lime slices for garnishing.
This straightforward method makes it a breeze to enjoy these delicious bars at home!
How to Serve
Now that your Key Lime Pie Bars are ready, here are some fantastic tips on how to serve them:
1. Presentation: Arrange the bars on a decorative platter. A simple garnish of lime slices can enhance the visual appeal.
2. Top It Off: Consider adding a dollop of whipped cream for a creamy contrast. You can also sprinkle some lime zest on top for added flavor and color.
3. Chill for Best Taste: Serve the bars chilled. They are best enjoyed refreshing and cold, especially on warm days.
4. Pair with Beverages: These bars pair wonderfully with iced tea, lemonade, or a refreshing mojito.
5. Offer a Variety: If hosting a gathering, consider serving them alongside other dessert options for greater variety.
By thoughtfully presenting and serving these Key Lime Pie Bars, you can create a wonderful dessert experience that your guests will remember!
Additional Tips
– Use Fresh Key Limes: For the best flavor, opt for fresh key limes rather than bottled juice. Fresh limes will give your Key Lime Pie Bars a more vibrant and authentic taste.
– Chill Thoroughly: Ensure the bars are fully chilled before serving to achieve the ideal texture. This will make them easier to cut and enhance their refreshing taste.
– Customize the Sweetness: If you prefer a more tart flavor, adjust the sugar or increase the lime juice slightly to match your taste.
– Add a Chill Factor: For an extra refreshing treat, serve the bars with a scoop of lime sorbet or vanilla ice cream.
– Experiment with Coconut: Incorporate shredded coconut into the crust for a tropical twist that pairs perfectly with lime.
Recipe Variation
Get creative with your Key Lime Pie Bars by trying out these variations:
1. Gluten-Free Version: Substitute the graham cracker crumbs with gluten-free crumbs or finely ground nuts to make a gluten-free crust.
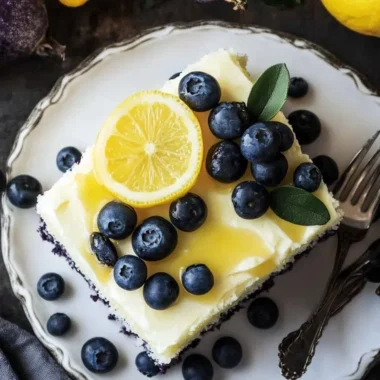
2. Berry Twist: Add fresh berries like blueberries or raspberries on top of the filling for a colorful and flavorful addition.
3. Coconut-Lime Bars: Mix in shredded unsweetened coconut into the filling for a taste of the tropics. This adds a chewy texture that complements the creaminess.
4. Chocolate Drizzle: Drizzle melted dark chocolate over the top of the finished bars before chilling for a luxurious flavor combination.
Freezing and Storage
– Storage: Keep any leftover Key Lime Pie Bars stored in an airtight container in the refrigerator. They will maintain their best quality for up to 4-5 days.
– Freezing: You can freeze these bars for up to 3 months. Make sure to wrap them tightly in plastic wrap and then store them in a freezer-safe container to prevent freezer burn. Thaw in the refrigerator before serving.
Special Equipment
To make your Key Lime Pie Bars, you will need the following equipment:
– 8×8 inch baking dish
– Mixing bowls
– Whisk or electric mixer
– Measuring cups and spoons
– Spatula for spreading the filling
– Knife for slicing
Frequently Asked Questions
Can I use regular limes instead of key limes?
Yes, you can use regular limes in place of key limes. However, the flavor will be slightly different; key limes have a more intense tartness.
How long should I chill the bars before serving?
It’s ideal to chill the bars for at least 2 hours, but you can leave them in the refrigerator overnight for an even firmer texture.
Can I make these bars dairy-free?
Yes! Substitute unsweetened coconut milk for sweetened condensed milk, and use plant-based butter for the crust. Adjust the recipe accordingly for sweetness and tartness.
What if I don’t have graham cracker crumbs?
You can make a crust with crushed vanilla wafer cookies or digestive biscuits as alternatives.
How can I tell when the filling is set?
The filling is set when it’s no longer jiggly and has a firm surface. It should not be overcooked, as this can cause it to crack.
Conclusion
Key Lime Pie Bars are a refreshing treat that will leave your taste buds tingling. With their zesty lime flavor, creamy filling, and buttery crust, it’s easy to see why these bars are a hit with so many. Not only are they simple to prepare, but they also make any gathering feel special. Whether you choose to serve them for a summer barbecue or as a delightful dessert at a family meal, these bars are sure to impress anyone who tries them. Plan to make these Key Lime Pie Bars your go-to dessert for both casual and festive occasions.
Key Lime Pie Bars: An Incredible Ultimate Recipe to Delight You
- Prep Time: 15 minutes
- Cook Time: 25-30 minutes
- Total Time: 43 minute
Ingredients
– For the crust:
– 1 ½ cups graham cracker crumbs
– ½ cup granulated sugar
– ½ cup unsalted butter, melted
– For the filling:
– 4 large egg yolks
– 1 can (14 ounces) sweetened condensed milk
– ½ cup key lime juice (fresh or bottled)
– Zest of 2 key limes (or regular limes)
– For serving:
– Whipped cream (optional)
– Lime slices for garnish (optional)
Instructions
Creating these Key Lime Pie Bars is a simple process that follows these easy steps:
1. Preheat the Oven: Preheat your oven to 350°F (175°C).
2. Prepare the Crust: In a medium bowl, combine graham cracker crumbs, granulated sugar, and melted butter. Mix until well combined.
3. Form the Crust: Press the mixture evenly into the bottom of a greased 8×8 inch baking dish. Flatten it with the back of a measuring cup or your fingers to create an even layer.
4. Bake the Crust: Place the dish in the preheated oven and bake for about 10 minutes, until slightly golden. Remove from the oven and let it cool.
5. Make the Filling: In a large bowl, whisk together the egg yolks until they’re light in color. Then, add in the sweetened condensed milk and mix until combined.
6. Add Lime Juice and Zest: Gradually add the key lime juice and lime zest to the mixture, stirring gently until everything is well combined.
7. Pour Filling Over Crust: Pour the filling into the cooled crust, spreading it evenly.
8. Bake Again: Return the dish to the oven and bake for another 15-20 minutes, just until the filling is set.
9. Cool the Bars: Remove from the oven and allow the bars to cool at room temperature for about 30 minutes. Then transfer to the refrigerator and chill for at least 1.5 to 2 hours to allow them to set completely.
10. Slice and Serve: Once chilled, cut the bars into squares and, if desired, serve with whipped cream and lime slices for garnishing.
This straightforward method makes it a breeze to enjoy these delicious bars at home!
Nutrition
- Serving Size: 16 bars
- Calories: 200 calories per bar
- Fat: 9g
- Protein: 2g